TimbreTwister was an individual project, completed as part of the ‘Audio Experience Design’ module, part of the Design Engineering (MEng) course at Imperial College London.
Timbre refers to ‘a quality of sound that makes voices or music instruments sound different from each other’. Although a key factor in how we perceive music and sound, Timbre is often overlooked by casual music listeners, instead preferring to focus on overall pitch, tempo, and the amount of bass. The aim of TimbreTwister was change this and give casual listeners a better understanding of how timbre affects music.
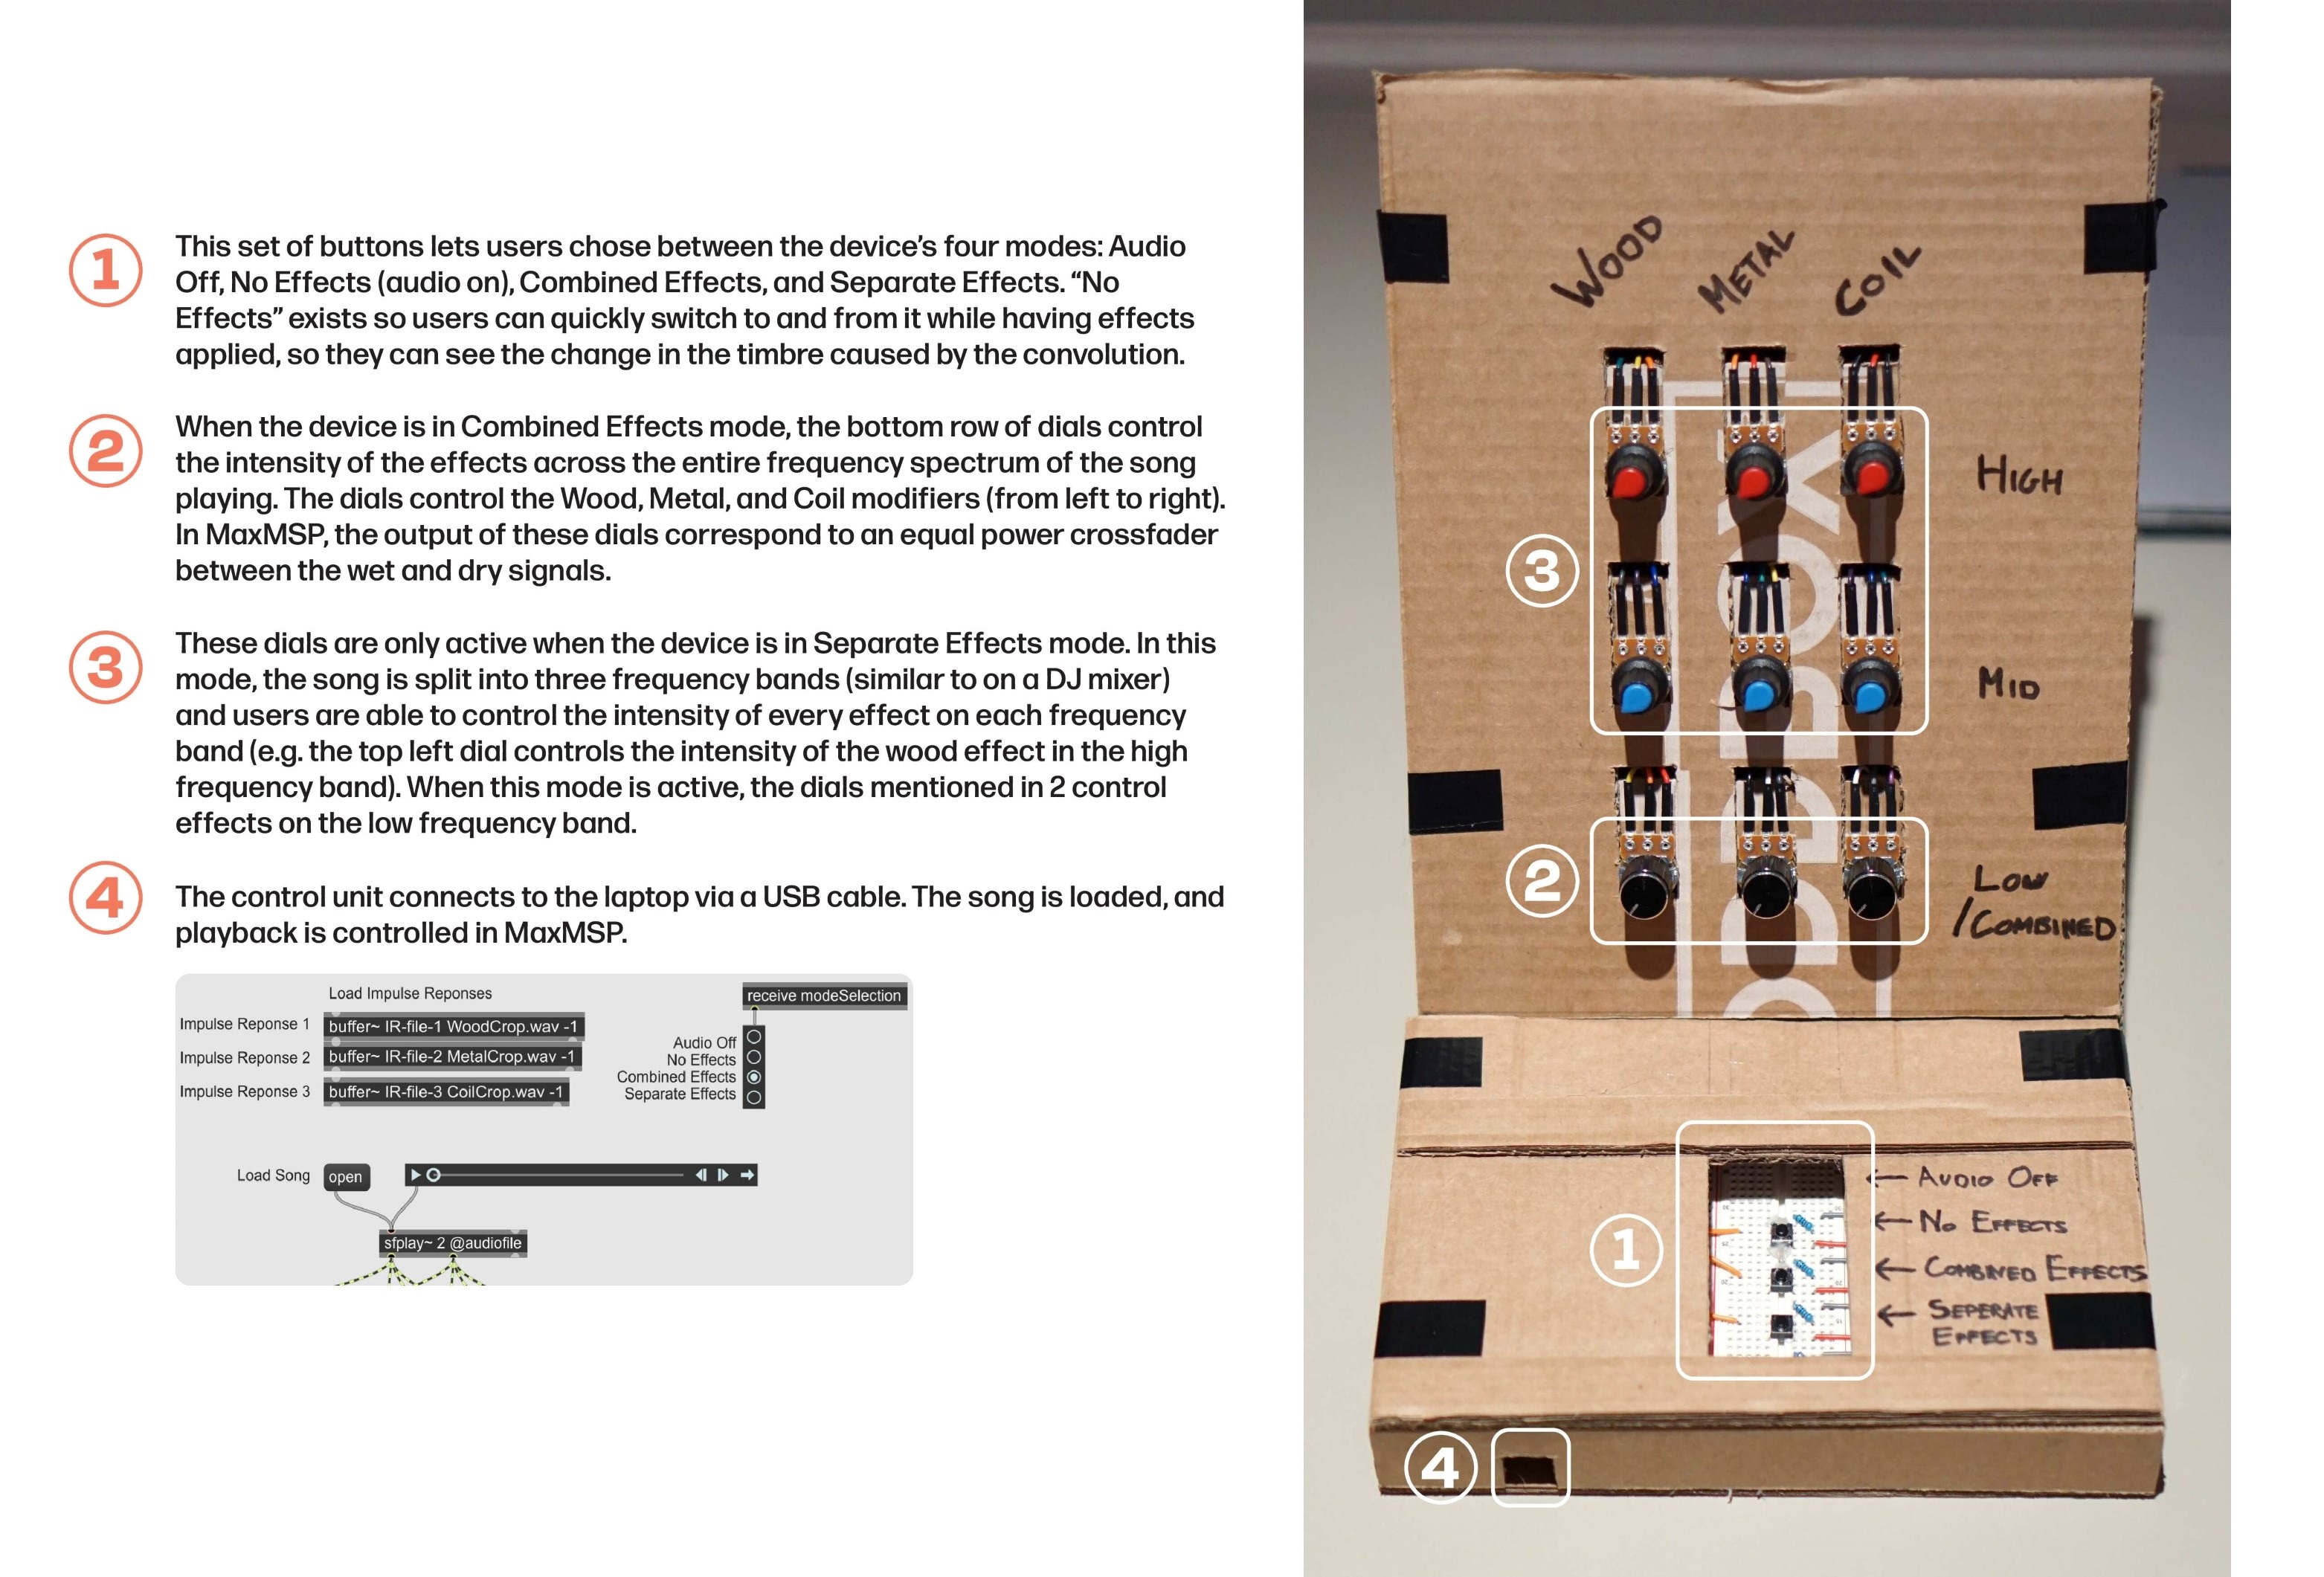
To achieve this aim, a seamless real-time audio-experience installation was created. Participants were able to change the intensity of various sound modifiers, inspired by different materials (wood, metal, plastic), affecting either the entire song or specific bands of the song (low frequencies, mid frequencies, high frequencies). By changing these modifiers, participants were in control of the timbre of the song.
 Overview of the key functions of the final version of TimbreTwister
Development process
Aims and work packages
To create a project that met the overall goal, clear aims were established which were mapped onto work packages.
Work packages were worked on sequentially, each relies on the prior one being completed. This offered a clear work plan and allowed me to first produce a basic working system before developing it further.
| # | Aim | Work package |
|---|---|---|
| 1 | Let participants change the timbre of a song, making it “sound” like various materials (e.g. wood, metal, etc.) | Develop a system in MaxMSP to perform multiple signal convolutions in series with different impulse responses, allow intensity control, and perform convolutions on each band from a 3-band signal crossover. |
| 2 | The effect of the various timbre changes should be different, and should “sound” like the actual material. | Record multiple impulse responses from various materials, test their effect in MaxMSP, chose and crop the best three. |
| 3 | The system should be intuitive and easy to use for a casual music listener with a typical proficiency in tech. | Build a physical control unit that allows for changing the convolution intensity of each material at each frequency band, and allows for operation mode selection. Integrate the control unit with the MaxMSP system using an Arduino microcontroller. |
Work package 1: Signal processing
First, I focused on creating a MVP using only MaxMSP. In the first iteration, I used impulse responses from the internet, and used MaxMSP sliders instead of physical knobs to control the intensity. This allowed to first produce a basic working system. Once further work packages were completed, these were removed. This displays an overview of the entire patch.
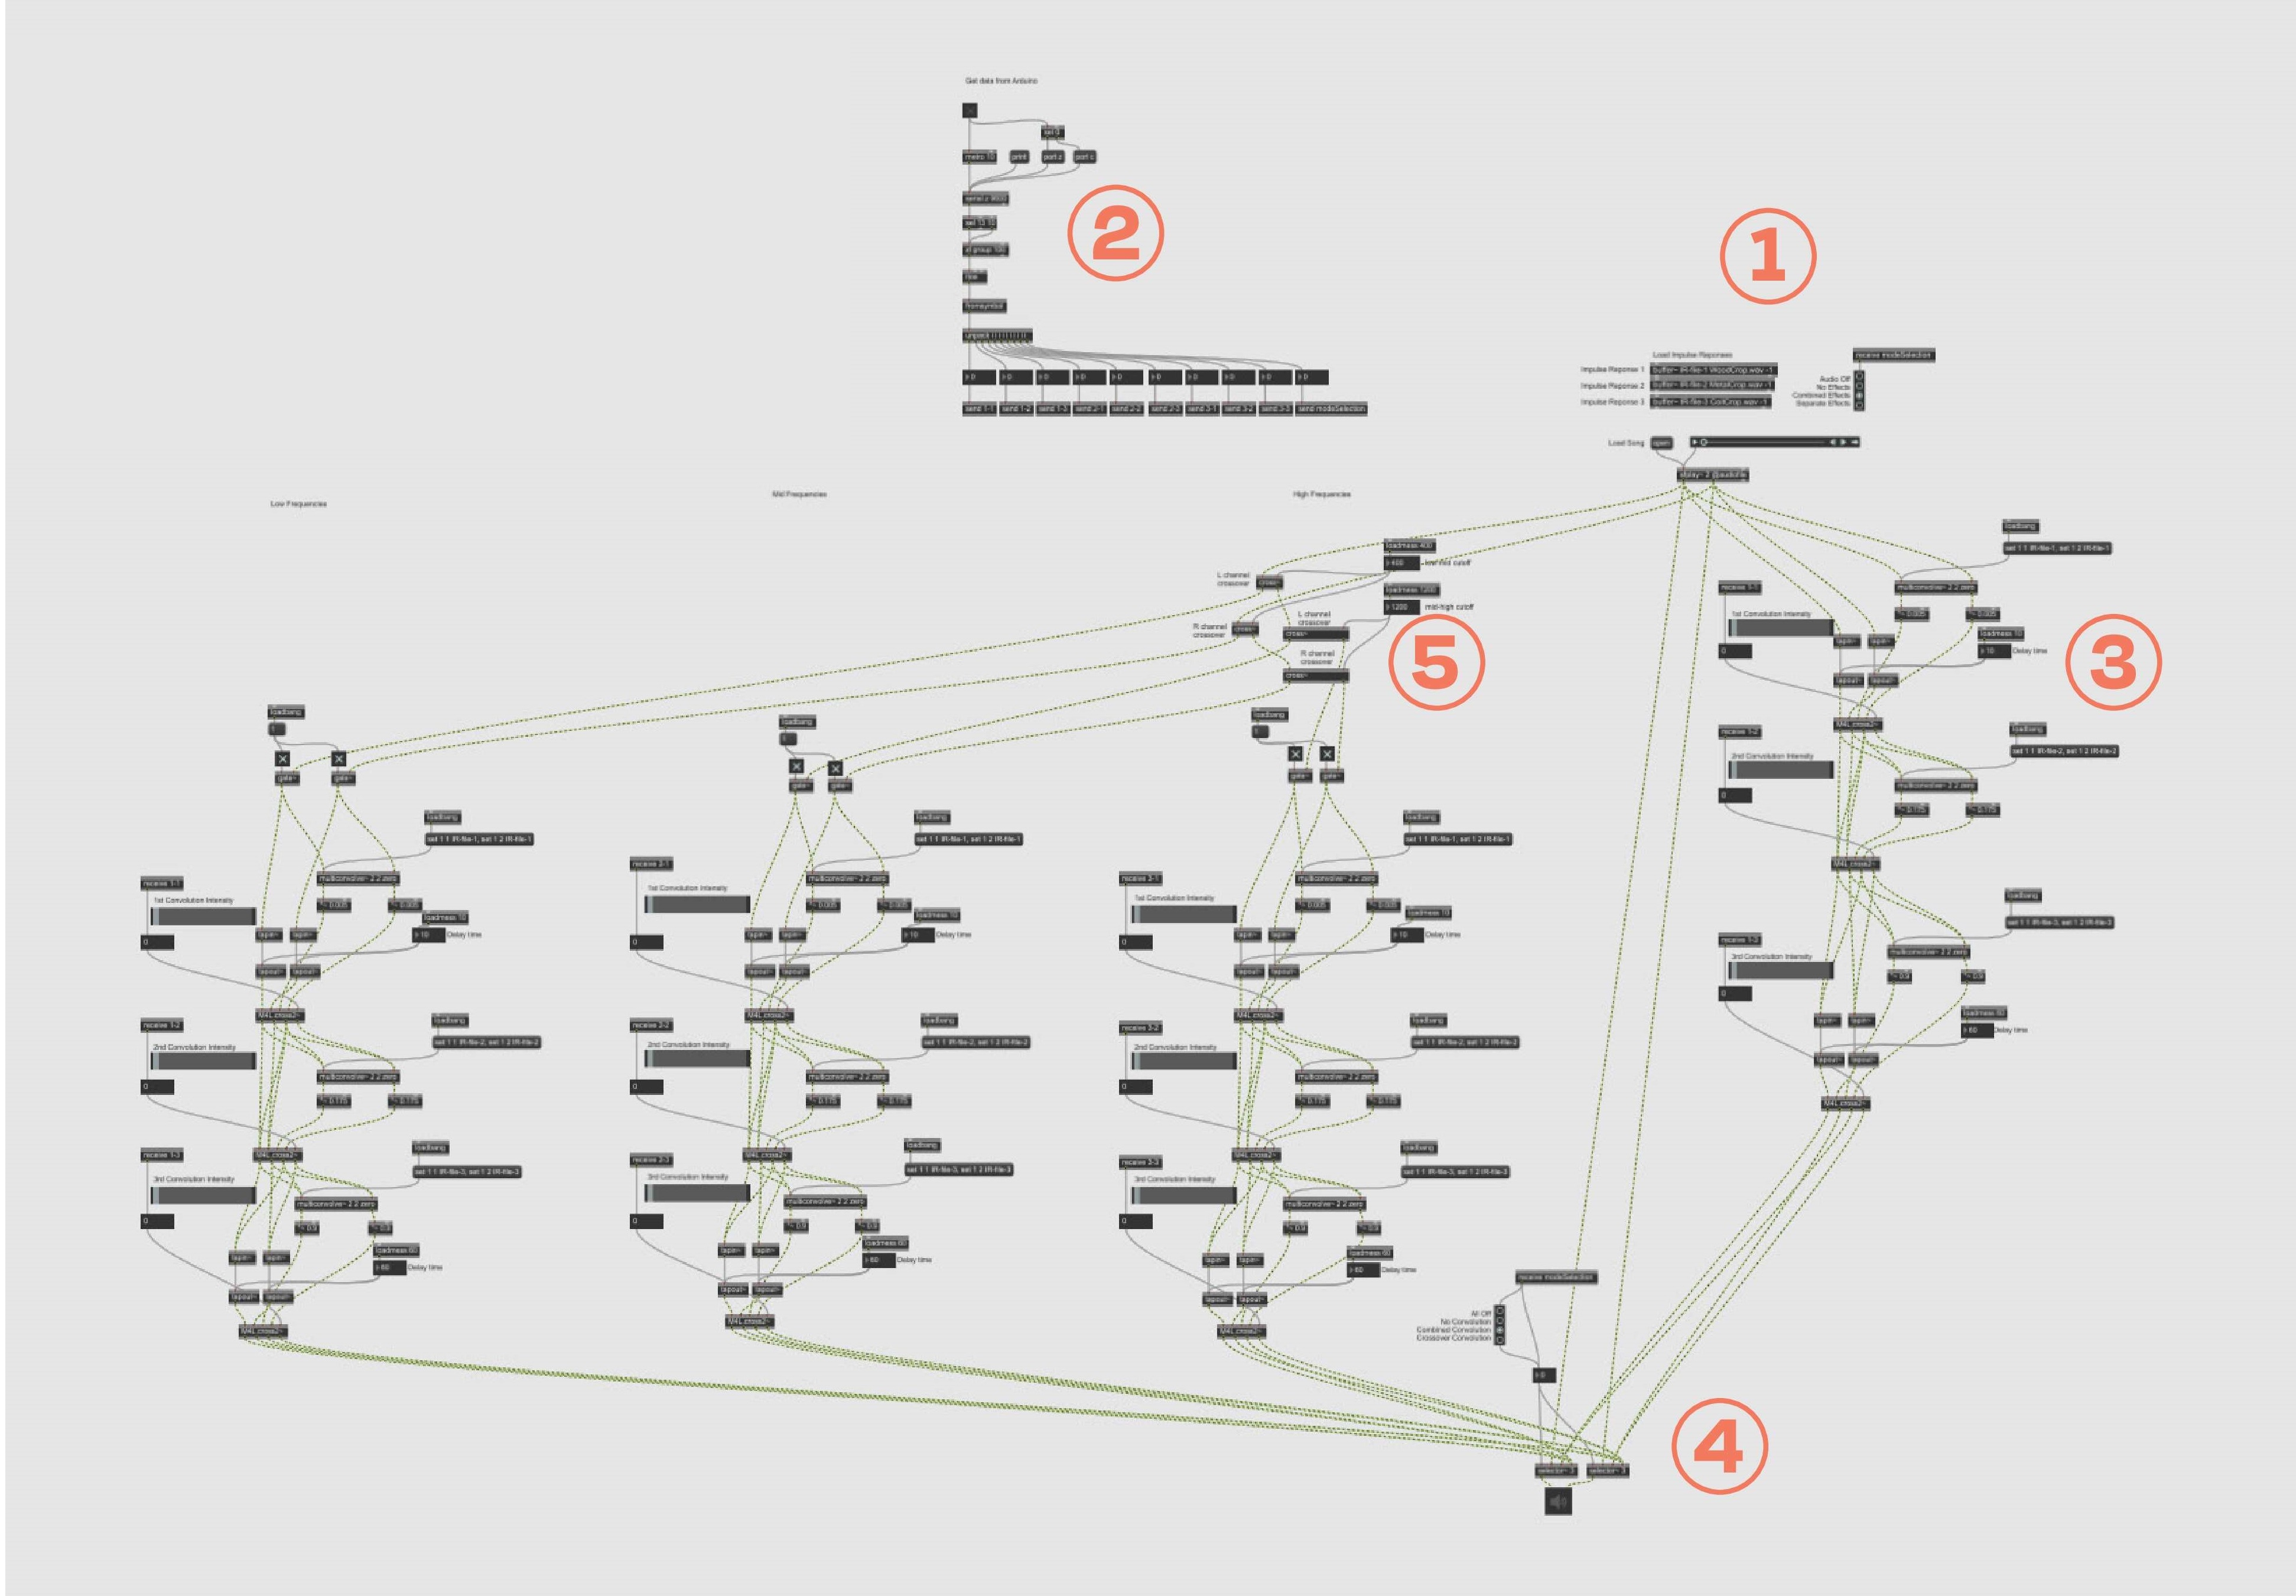 MaxMSP patch overview
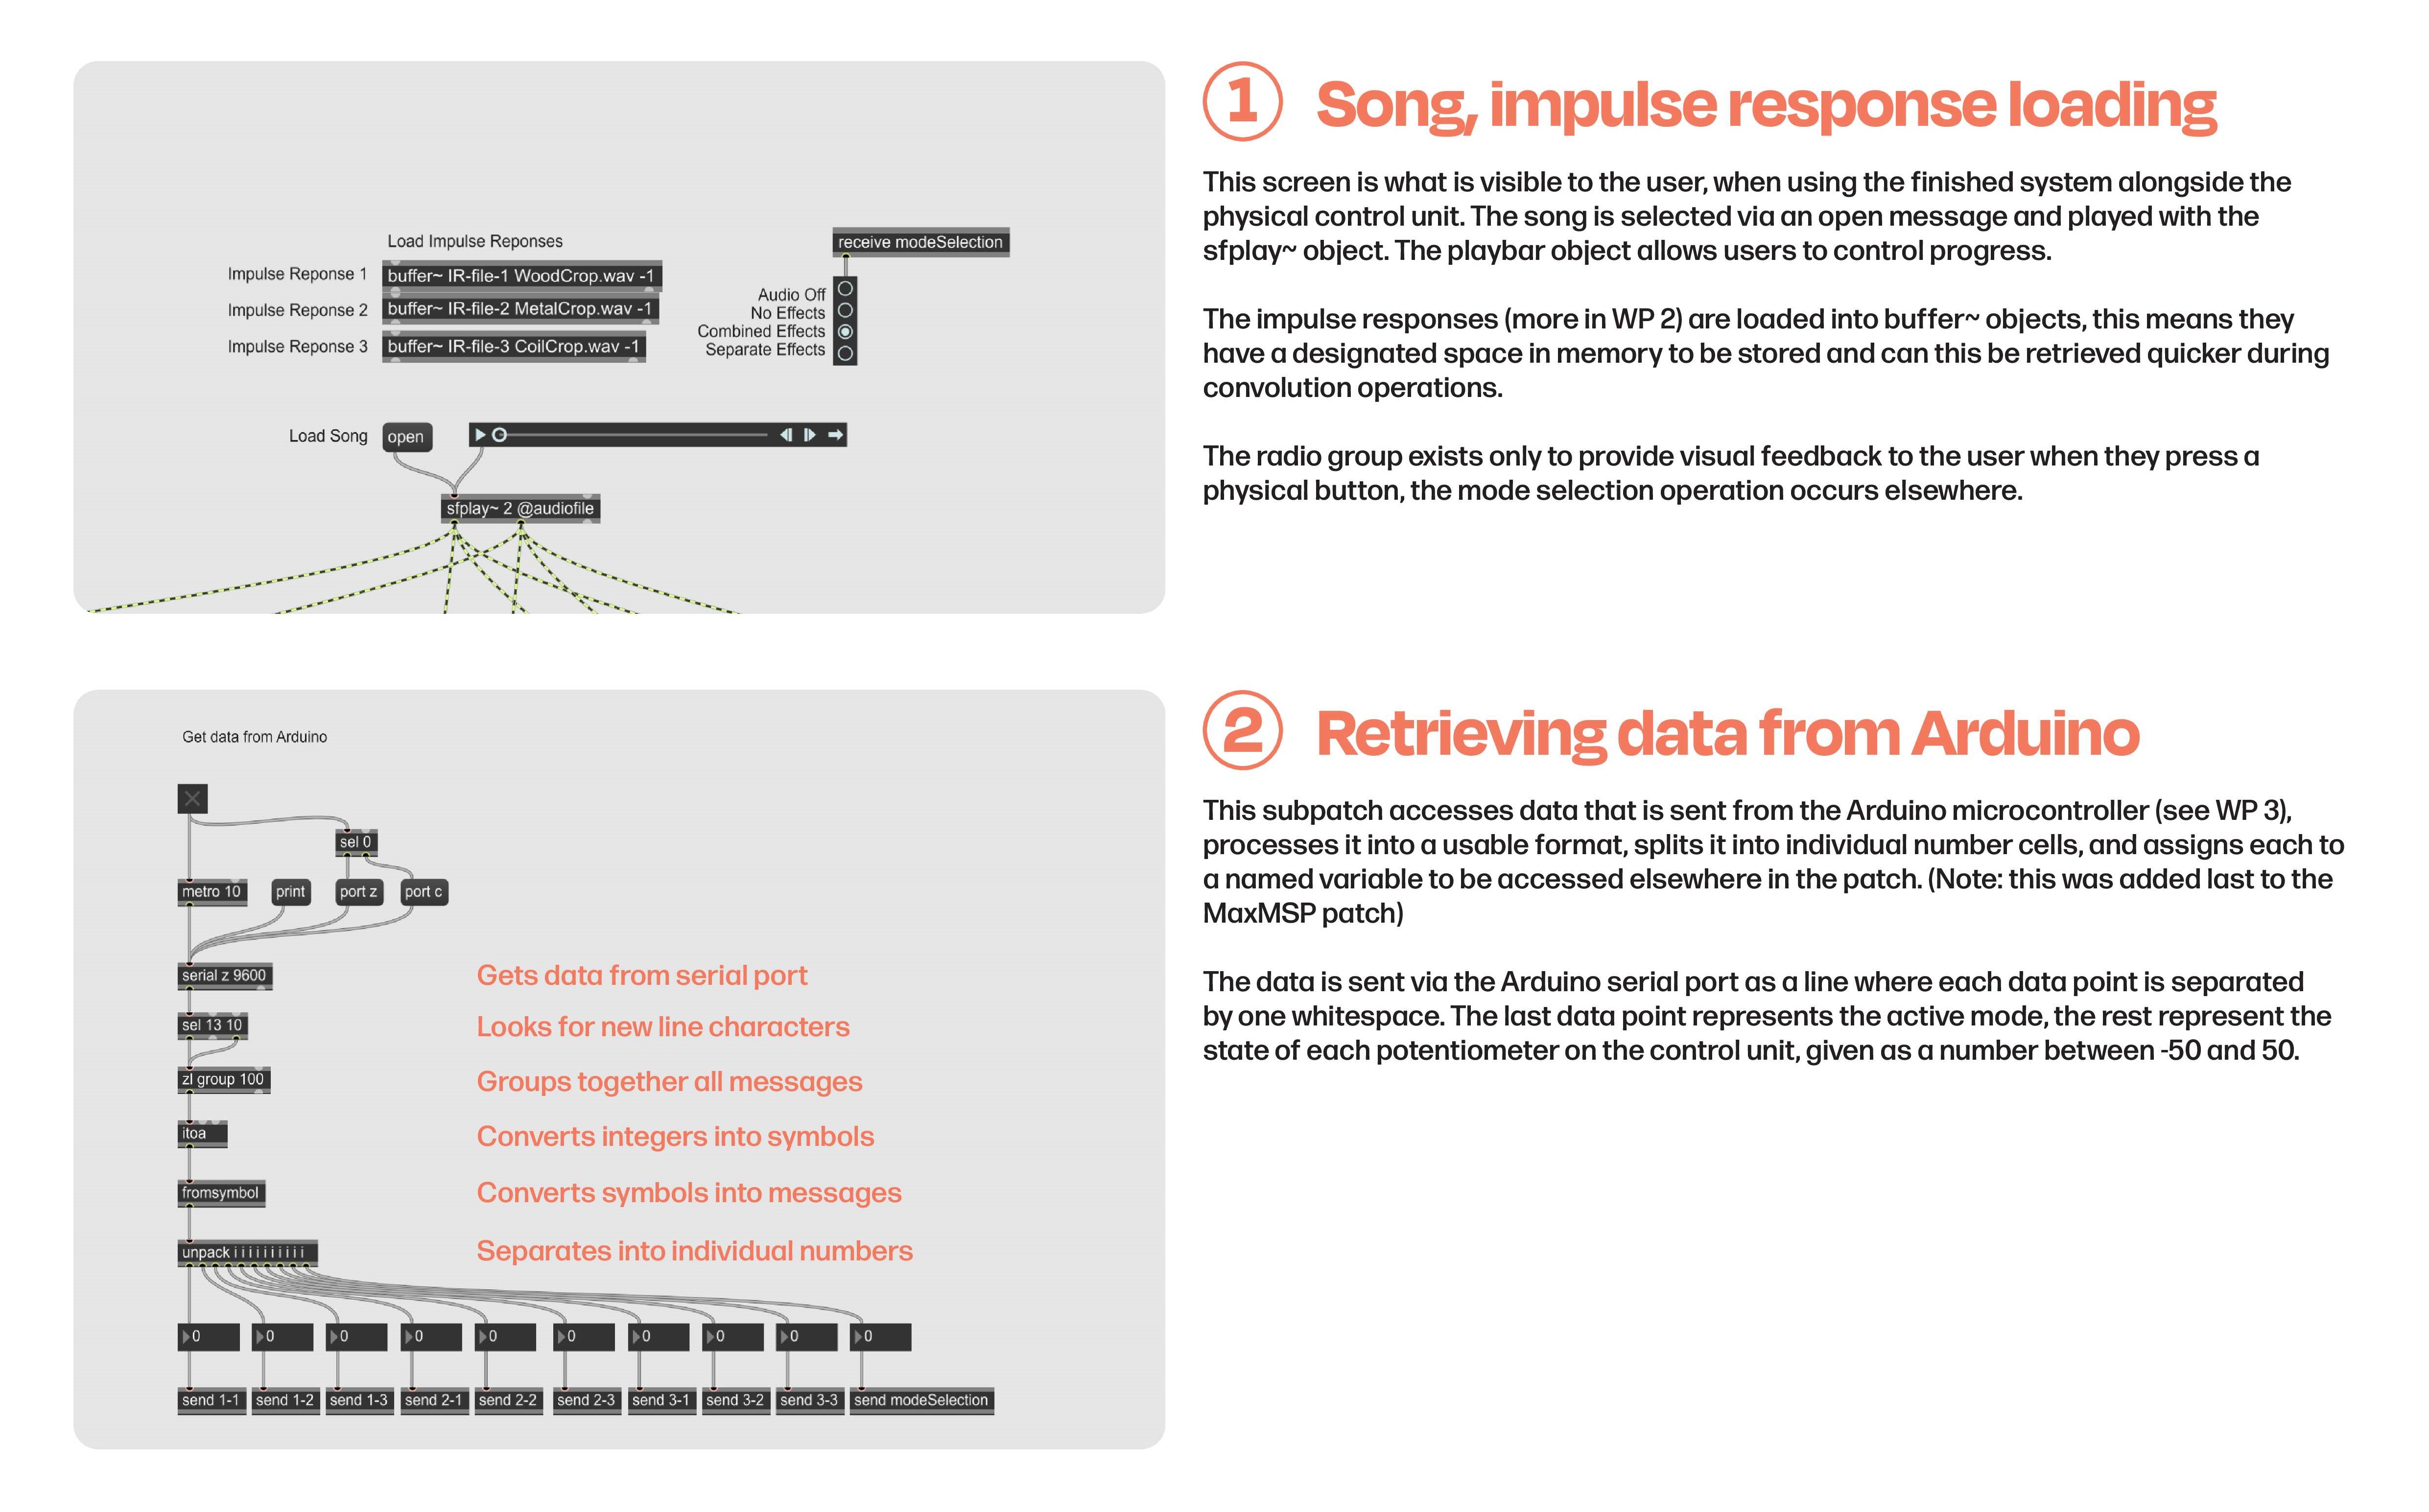 Song and impulse response loading and Arduino data retrieval
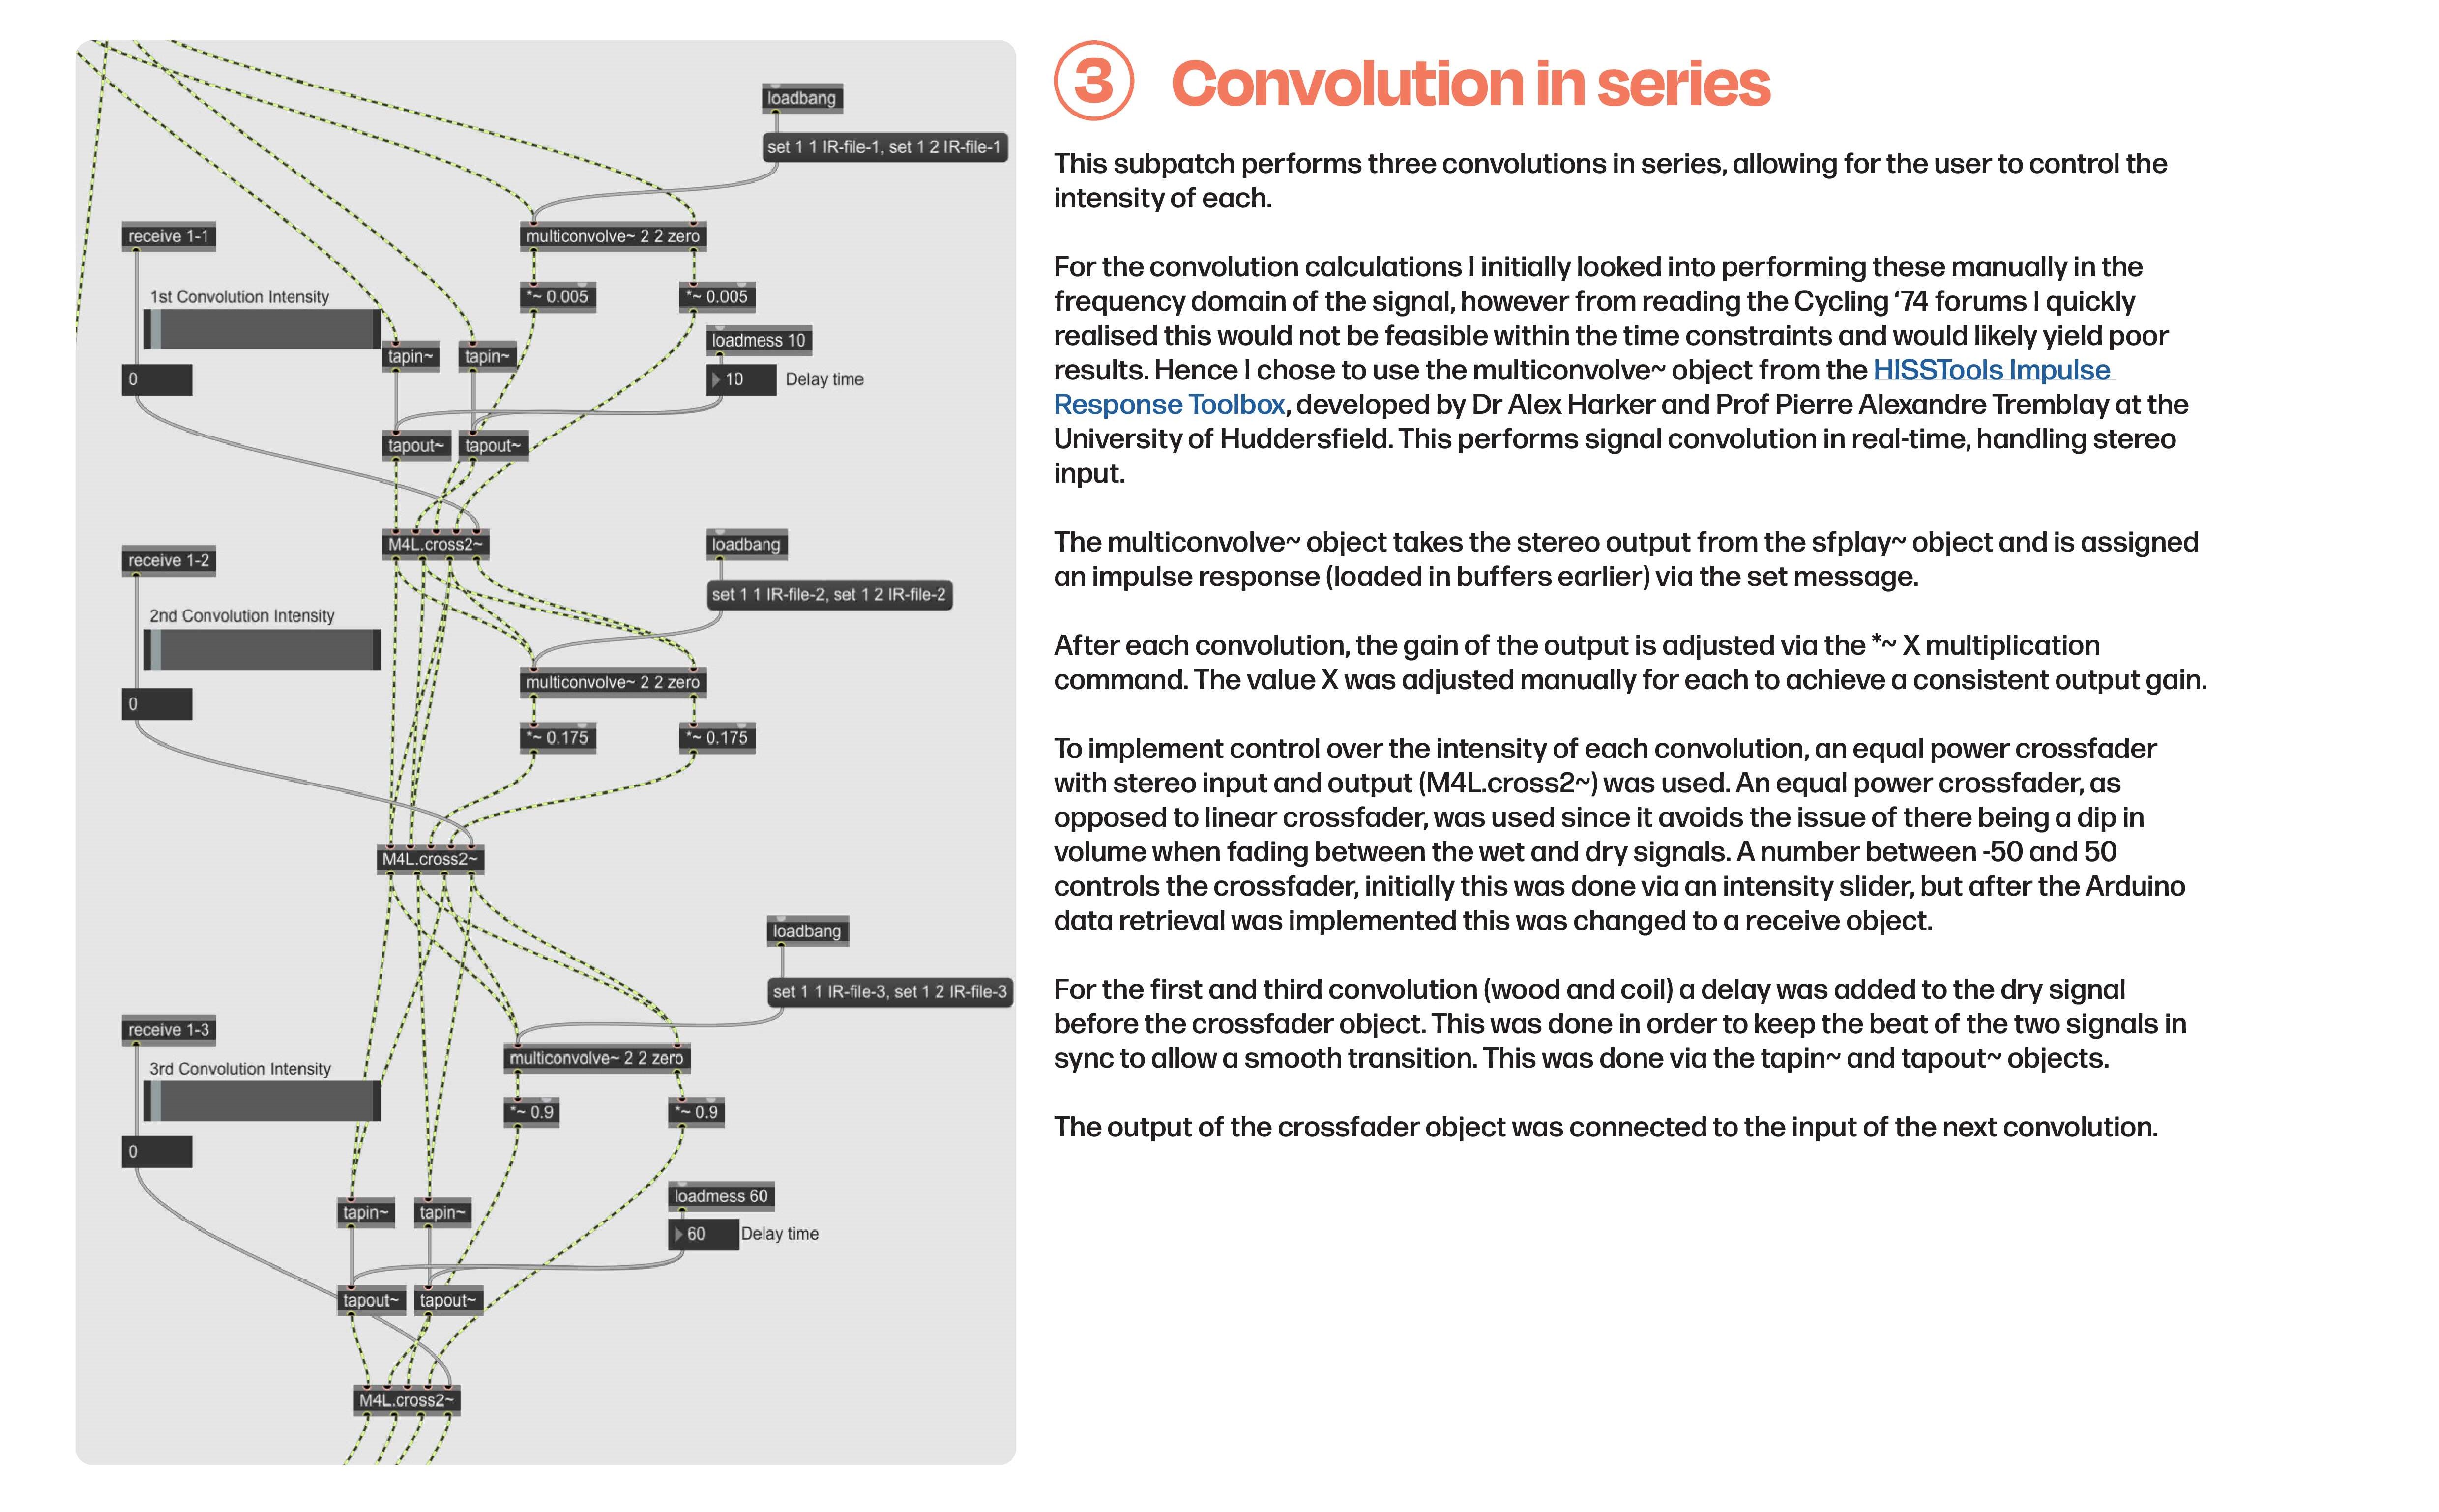 Audio convolution in series
 Mode selection and crossover implementation
Work package 2: Recording impulse responses
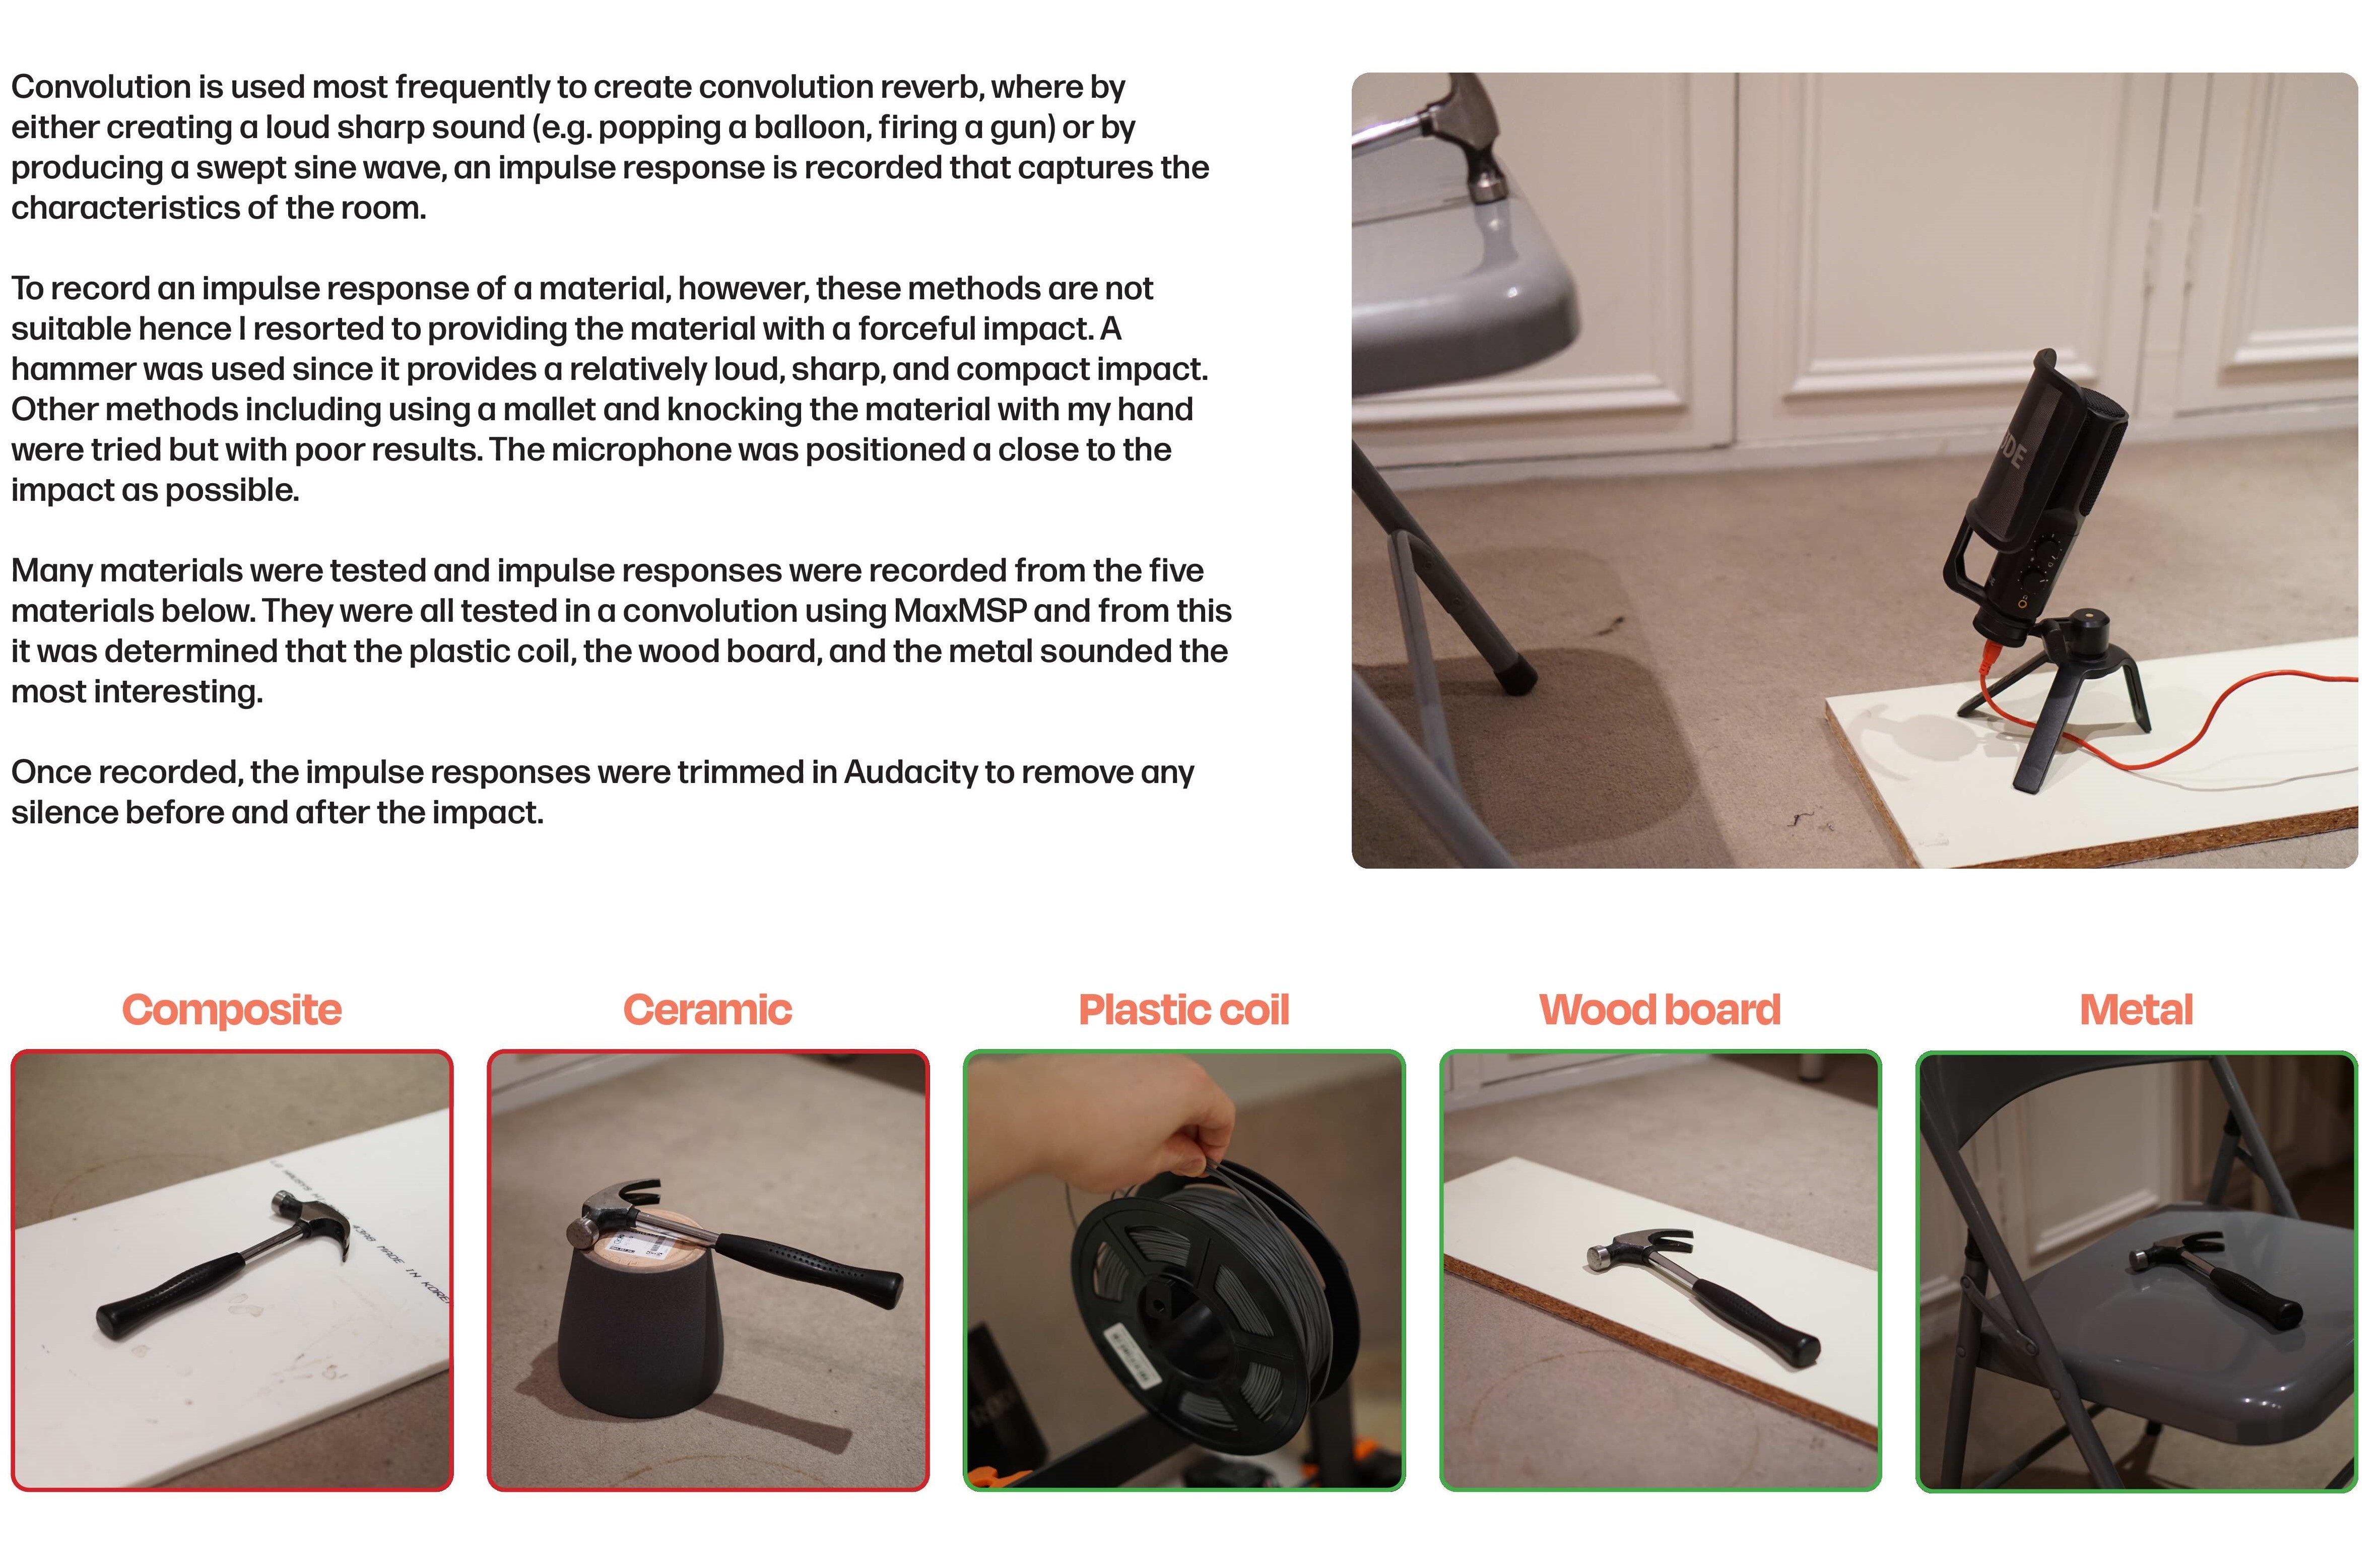 Recording impulse responses
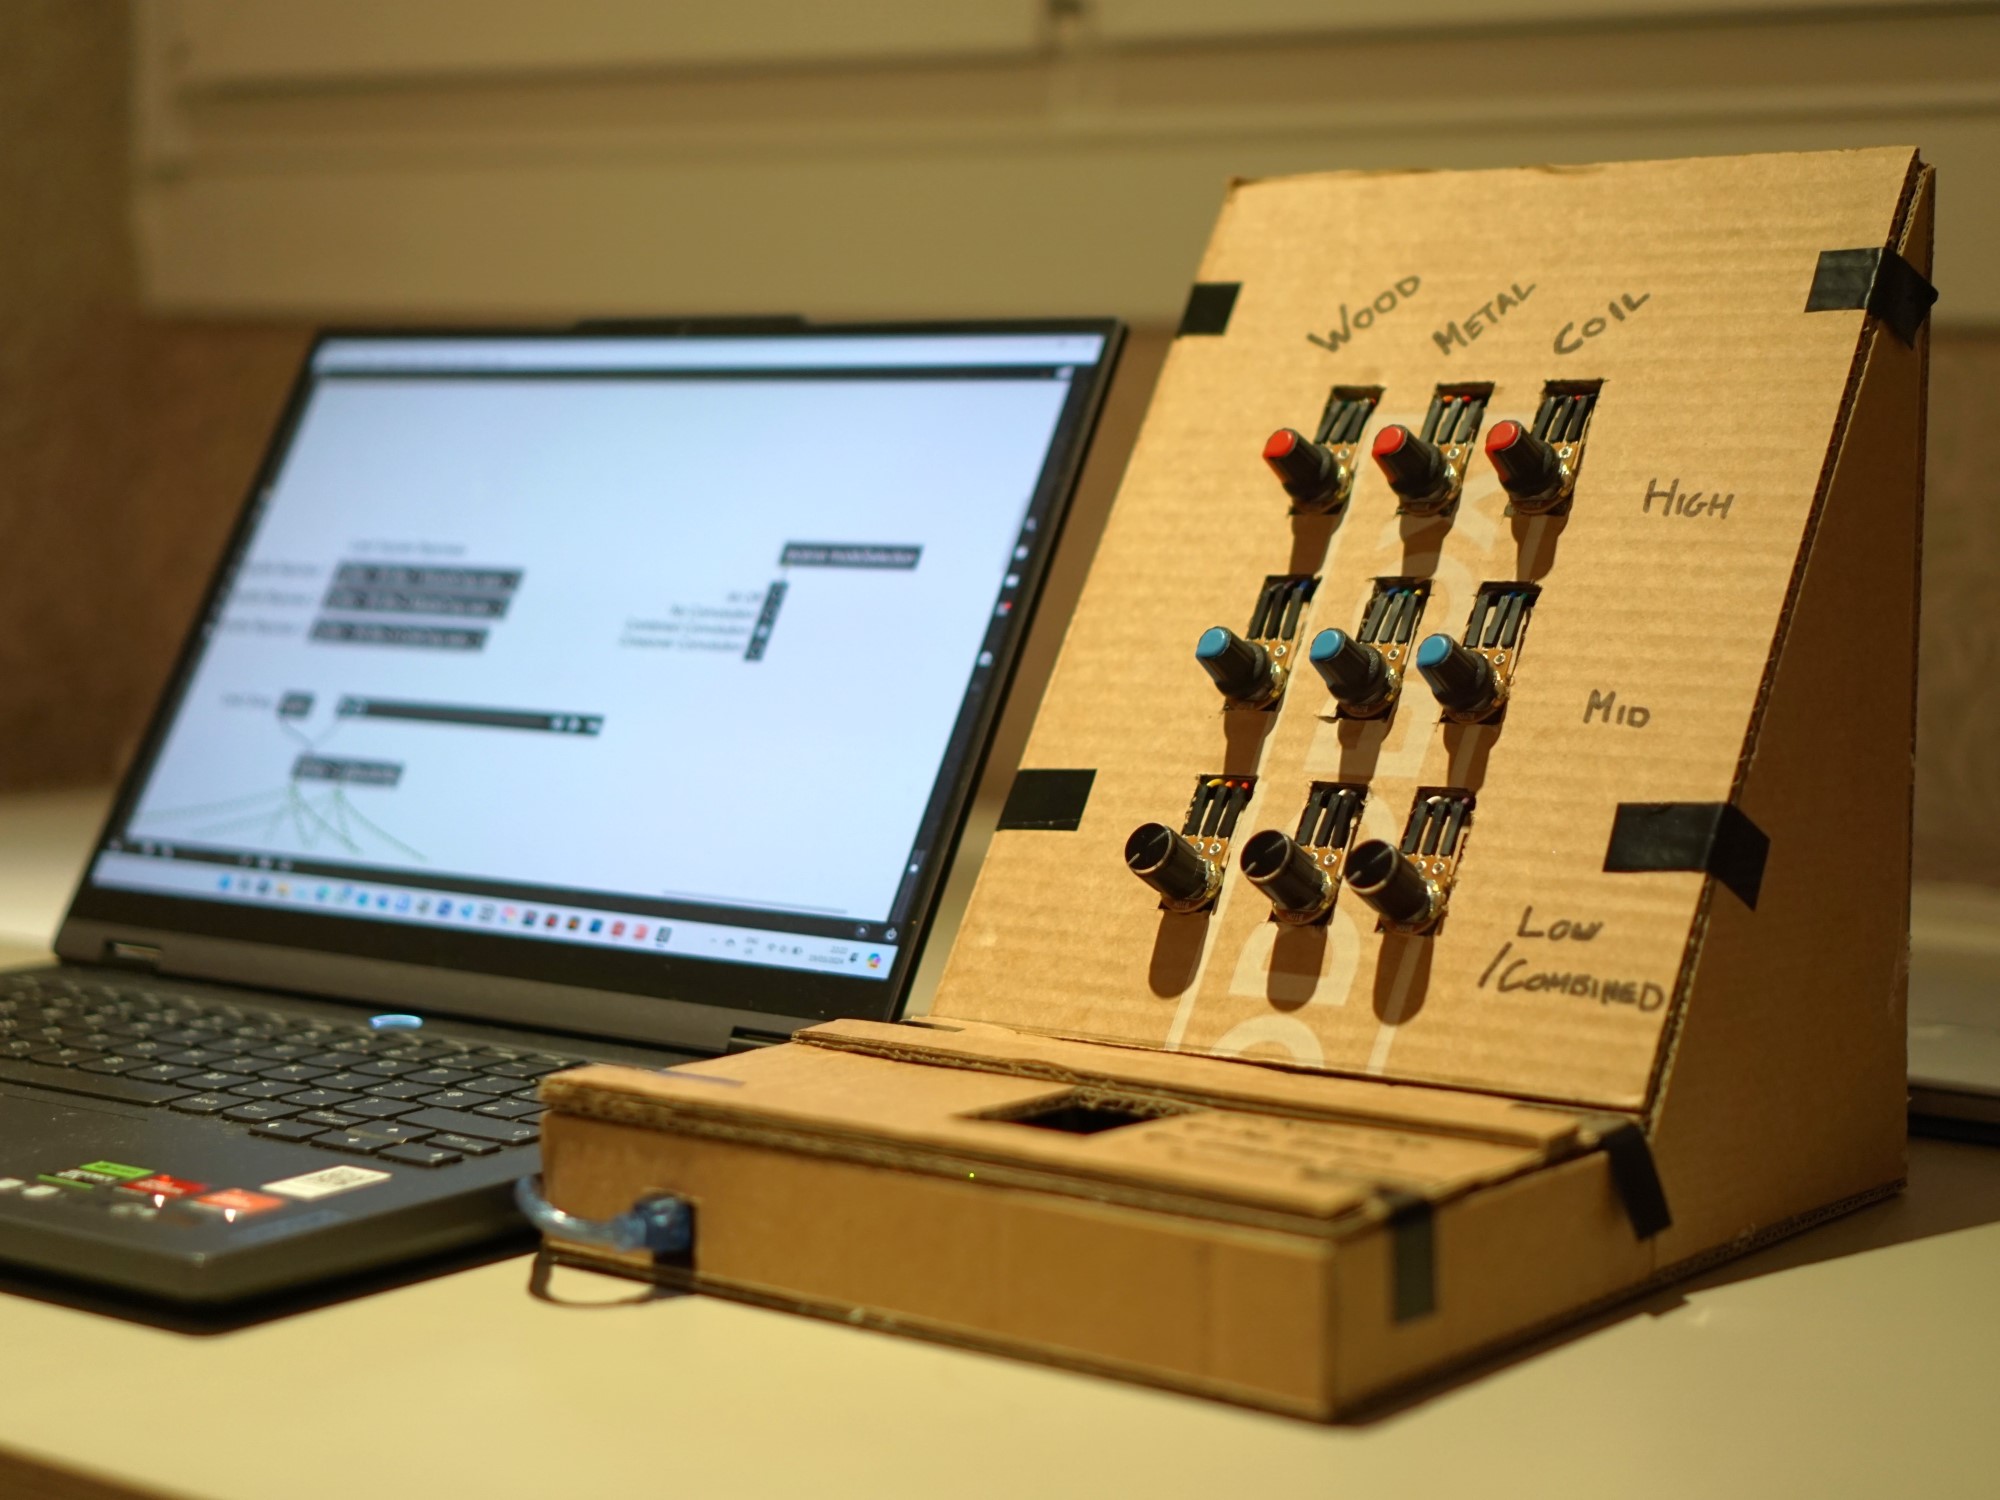
Work package 3: Building control unit
For the physical control unit, the goal was that it would be intuitive, fun and easy to use for a casual music listener with a typical proficiency in tech. As such, I went with a simple design where the intensity knobs, the focal point, are the first thing you notice when you look at the unit. In order to keep it intuitive, I mimicked the knob layout of a DJ mixer, adding an element of fun as well.
 Building the control unit
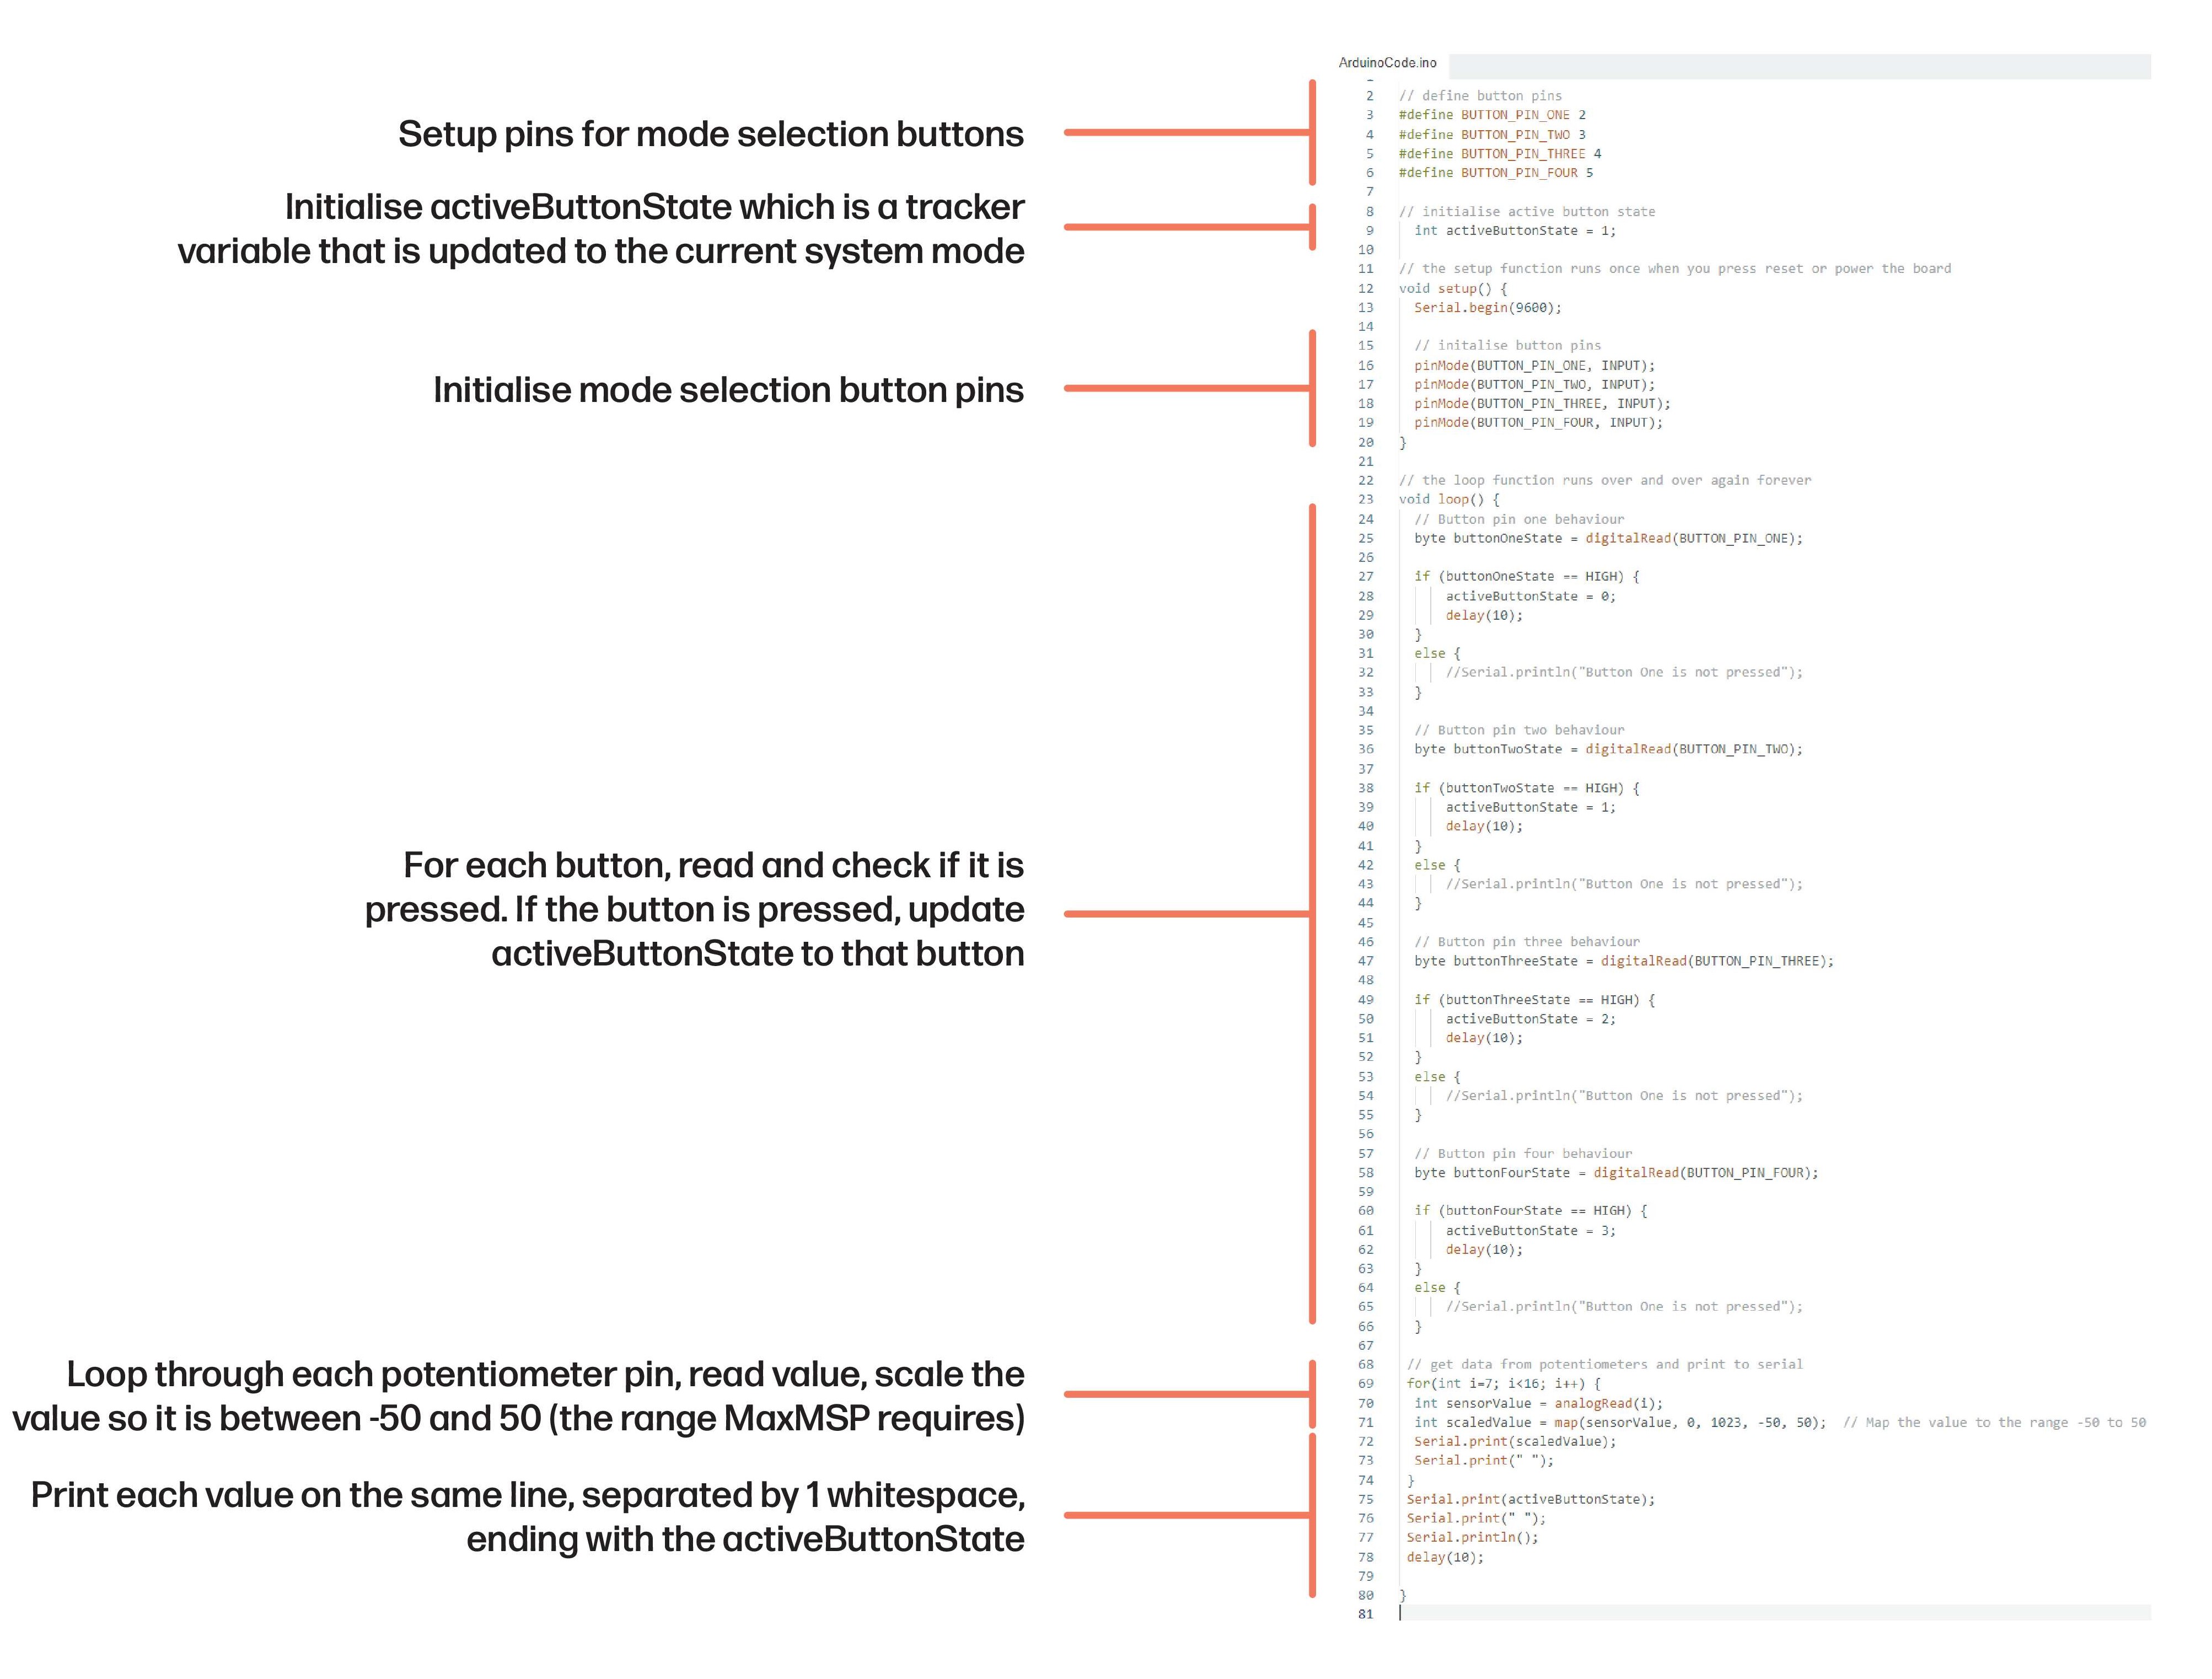 Control unit code